If you are in the mood of doing something creative and experimental with your sewing machine, then here we have a guide for you to embroider with a regular sewing machine.
If anyone is skeptical about embroidering with a regular sewing machine, sewing enthusiasts are always embroidering with regular ones.
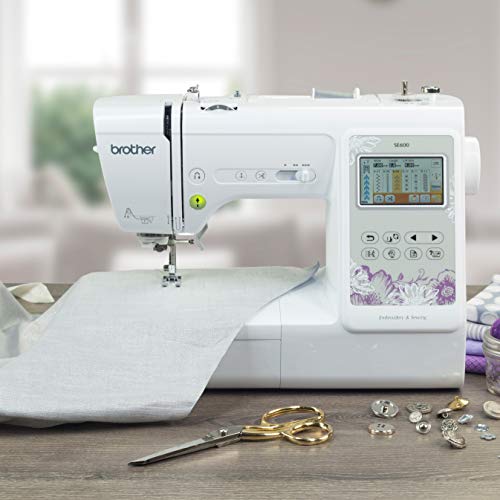
Also, they suggest you don’t need a fancy foot for stitching. You can embroider with a free-motion embroidery foot or a regular foot.
We will be honest with you’re here; it will be a little tricky, but you should be able to get a hold of it if you are a sewist. By the way, do it carefully, so you end up stitching your fingers in!
Supplies needed
You will need- a template of design; a convertible free motion foot or see-through foot, a water-soluble stabilizer, a fine-line marker, a glue stick, and threads.
We have mentioned two different foots to embroider with. You will be able to do some variations while embroidering with two different foots. You will learn about the uses of two different presser foots more in the upcoming sections.
First, we will give you directions for embroidering with a see-through presser foot. We are suggesting using a see-through presser foot so the design can be visible to you, and you stitch at ease.
Follow the steps below to weave something creative on a fabric-
Step 1: Pick a design
You can print out some easy designs to embroider. Also, you make a design for yourself if you wish. You should go for designs containing rather simple linings if you are a newbie with sewing machines.
Step 2: Tracing the design
When you have the design with you, place the paper on a flat surface. Then, place the water-soluble stabilizer on the top of the design.
A stabilizer is necessary for any kind of embroidering process. It will aid to trace and emerge designs on fabrics.
Experts suggest using a water-soluble stabilizer so it can easily be removed from a piece of fabric after you are done embroidering. Also, buy one that is not too fuzzy to trace a design on it. That will make it hard for you to follow where the design lines are while stitching.
However, cut and prepare a piece of stabilizer that is bigger than the design you have chosen. Once your stabilizer is on top of the design, you need to trace the design mindfully on it with a fine-line marker. You can also press the stabilizer on the fabric with a couple of paperweights to prevent improper tracings or smudging the lines.
After completing the tracing work, you need to cut off the stabilizer a little again if it is too big. It will be inconvenient for you to embroider if you don’t cut the stabilizer roughly, keeping 1 inch around the design.
Step 3: Glue the stabilizer
Now, take the fabric you want the design to emerge on. Next, glue one side of the stabilizer then attaches it to the particular place where you want the design to be on the fabric.
Step 4: Sewing time
You need to select a thread color before you start to sew. If you are confused about which spool of thread to pick, simply consider that, lighter color fabrics need darker color threads and vice versa.
Tip: You can try out some threads on another piece of fabric to figure out the right color for the embroidering.
Next, fix a narrow stitch length to embroider the fabric. To stitch in all the details, you have your selected design; you need a narrow stitch length. You can start sewing once your figure out the stitch length.
Gradually, start stitching the design on the fabric. Lift the foot and pivot to stitch one line after another. You can stitch through a line several times to make it bolder.
Step 5: Remove the extra stabilizer
If you are done stitching in the design, next, you need to cut off the extra thread extending out from the design.
Now, you can remove the extra edges of the stabilizer from the design on your fabric. To remove the stabilizer entirely, you can pull it gently. But, if you are wary of the design and the fabric, then you should soak the fabric in the water, and it will dissolve slowly.
We are done with the one variation of embroidering with a see-through presser foot.
Let’s talk about the free-motion presser foot
You can do another variant of embroidering with the motion presser foot. With this kind of foot, you can fill up the design, unlike a see-through or regular presser foot. If you want, you can now take another piece of fabric and repeat the steps.
Read these tips to experiment in a better way-
You need to lower the feed dogs while using a free-motion presser foot. If you are not sure how to lower the feed dogs, consult the user manual. However, some free-motion presser foots come with a rubber patch to avoid the feed dogs.
You can buy embroidery threads if you want. It will certainly look better than the regular thread when your complete embroidering the whole design.
We have recommended dissolving the stabilizer at the beginning, but if you want, you can use a condensed stabilizer as well. It has nothing to do with the embroidering for your information. With a dissolvable stabilizer, you won’t be feeling having any discomfort while wearing the fabric. Again, if it’s a fabric that you are not going to wear, then you can use a condensed stabilizer.
We have already mentioned in one of the sections to pick a simpler design. We don’t want to sound discouraging, just don’t proceed to do any big project if you are a beginner; you might hurt yourself in the process. There’s nothing wrong with acknowledging the fact that you are a beginner. Learn to work the stitches at first. Then you can start a big project if you want.
Finally, while embroidering, if you go in the wrong direction, there’s nothing to worry about. You can stop the wheel and lift the presser foot, then cut off the thread and start again.
Keep it up!
Related Posts:
- Best Embroidery Machine for Home Based Business
- Best Brother Embroidery Machine
- Best Embroidery Sewing Machine