If you are wondering about using your regular sewing machine for free-motion quilting, this guide will help you through that.
You mainly do free motion quilting when you want to put some designs on a quilt.
For the side stitching, you can use the regular foot. To do free motion quilting with your home machine, you will need some supplies.
Let’s see what you will need and how you can quilt with a regular sewing machine.
Supplies
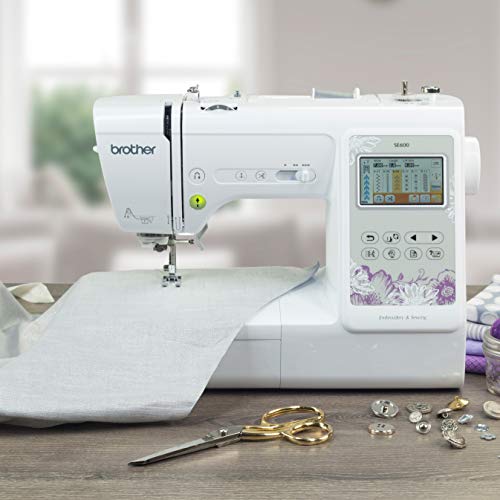
Free Motion Foot
For free-motion quilting first, you will need an open and closed-toe foot. Also, make sure you set the feed dogs down as you will be doing it in free motion.
Needles
You need to buy some sharp quilting needles. A normal needle isn’t going to bring you good results in quilting.
Gloves
Buy yourself some safety gloves; also, they will help you to move fabrics around easily.
Quilting Table
It will be really handy if you buy or make a glass quilting table. Also, you will get more space for quilting.
Quilting Materials
Buy some batting, backing, and fabrics of your choice for making a quilt that will go on the top side of the quilt and, finally, some designs.
We will start with the quilting process now!
Step 1
Cut the very first layer of the quilt. After that, take the batting and use the top layer as a template to shape the batting.
After cutting the batting, you will need to cut the backing of the quilt. So, prepare all three layers for the quilt.
Step 2
You can add the layers with some adhesive spray or with some pins. We recommend you use adhesive spray. Also, you will need pins to put the layers together nicely. Once the fabrics are ready to be sewn together, you can set your sewing machine.
Step 3
Next, with the regular foot of your machine, you can finish stitching the side of the quilts. Make sure you are stitching it by the wrong side. Also, keep a little opening in one of the sides to take the right side out after you finish stitching the quilt on the wrong side.
Step 4
When you are done stitching the sides, cut the corner of the quilt, as they usually get bulky.
Step 5
Next, take the right side out of the quilt and close the opening of the quilt. You need to iron it a little bit so you can take all the layers together and stitch them properly.
Step 6
Now, stitch the quilt from side to side to prepare it for free motion quilting or, in other words, to add some designs to it.
Step 7
Once you are done with stitching through the whole fabric, make some nice designs on it as you wish. After this step, we will shift to free motion quilting.
Step 8
If you are done with designing the quilt, you can add the free motion foot on the machine. Also, make sure you have set the feed dogs down. If your machine doesn’t have the feature of lowering the feed dogs, you can buy a rubber cover for the feed dog. Also, some free motion foot comes with a rubber cover. So, you can buy a free motion foot that comes with a rubber cover.
Step 9
When the machine is all set to start with free motion quilting, you need to go from the first borders of your designs. Then you gradually go inside the design. You can use a hoop around the design if you want.
Step 10
Now, put the bobbin thread on the target border of the design, then take the bobbin thread out. This way, you won’t have extra bobbin thread on the top sides of the quilt. Once the thread is out, then start from where you first put the bobbin thread.
You should go slowly with the free motion stitching, so you don’t mess up the design.
Step 11
When you are done with the borders, you need the cut the thread. You start from where you have finished. There is nothing to rush; go slowly and complete the design.
More Tips and Tricks
Extra Useful Tools
There are some other foots for quilting that you can use. We want you now about those- Bernina darning foot, Bernina quilting foot, embroidery foot, free motion embroidery foot, echo quilting foot, also Bernina stitch regulator. The stitch regulator helps the machine to produce consistent stitches. And all you need is a quilt, the consistent kind of stitches.
Right Pace
In a free-motion setting, the fabric is always on the move. Try to adopt a steady stitch for a better stitch. Too much pulling and pushing sometimes can bend the needle. Also, it can have a frayed or broken thread. You can practice with the pace. It might not come around always right the first time.
Rigid Needles
Quilting needles should be rigid enough for the process. Otherwise, you are not going to be happy with the result. Don’t worry about using a big needle for leaving holes on the fabric; the holes will be closed up by themselves after stitching.
Needle Speed
Ending up with satisfactory quilting results has a lot to do with the speed of the needle. If the needle is set in too slow motion, it will skip placed while going in and out of the fabrics. The too fast a needle can again cause the same. Try to set an even momentum for the needle to get the stitches right. Simply avoid speeding up and slowing down too much while quilting.
To Conclude
Free motion quilting is simply made things easier when it comes to designing a quilt. We have put side to straight side stitches on the quilt with a regular foot. You can do all of it why free motion as well. But you need to make sure you have marked the lines and design well so you can follow the design to go free motion.