 We all know that all sewing machines have a fundamental mechanism. But, the things that vary in the old and modern sewing machines are their set-ups and the process of use.
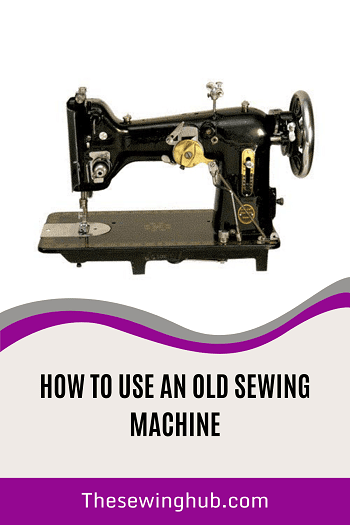
If you are in need of a guide to using an old sewing machine, then you are in luck today!
The guide that we have here for setting up and using an old sewing machine is not model or brand-specific.
But, it has been made considering almost all the old sewing machines.
That’s why its comprehensive steps are inclusive of all the old sewing machines, and you can follow this in general for any of the old sewing machines.
Setting Up And Using An Old Sewing Machine
Step 1
We will start with the cleaning of the old machine you have. If you have already cleaned the metal parts, re-painted them, then you move to step 2. But, if you haven’t cleaned the machine yet, then follow this step first.
First, clean and service your machine if you want it to serve to a great extent. You mainly need a lint brush and paint to clean and paint the metallic body of old sewing machines.
Step 2
Come to the sewing machine now. On the opposite side of the machine where it will be set, you will find two hinge pins.
They fiddle and won’t stay up on their own. You will have to set the sewing machine on those hinge pins. In order to set the hinge pins up, you need a helper/rubber to hold them together. Now, take the rubber band and put it on the hinge pins.
Step 3
Now, take your old sewing machine out on the hinge pins. If you notice at the backside of the machine, you will easily find two holes to set the machine on the pin. So, find the hole and set the machine on the top of the table with the help of the hinge pins. As the pins are fiddly, it could be a little hard to set the machine. But what can you do? It’s the way they are.
Step 4
Once the pins are inside the machine, you need to tighten the screws on them to hold it together. Take a screwdriver that suites the screws and tighten them.
Step 5
Next, cut the rubber band on the hinges pins and lower the machine on the table. And, now your machine is on the top of the sewing machine table.
Step 6
Now, you need to incorporate the belt into the machine. If the older belt is of no use, you need to buy a new belt. Don’t worry about finding them in the market; they are easily available.
To set the belt, put it in the machine wheel and tug it downwards from the front and back. Next, the end of the belt that you have at the backside thread it down through the belt plate.
Step 7
Underneath the table, there is a belt guide. You need to pass the belt through that. Then, pass the belt from down to the top of the belt plate at the front side of the machine.
Step 8
When the belt it on the top of the machine, you need to hook it together. There should be a hook with one of the ends of the belt. Now, make a hole on the end that doesn’t have the hook and add them together. The belt can be longer; you can adjust the length to hook them properly. Also, before you trim the belt, run the machine to check the belt setting is too tight or too loose.
Step 9
To get the machine going, move the handwheel first and immediately start running the treadle.
Step 10
We will start with handling the bobbin now. To take the bobbin out, slide the throat plate left, and press the little button your see at the front. By keeping the button pressed, take the bobbin out.
Step 11
Now, we will thread the bobbin. It’s mostly like the modern sewing machines; you will be intuitive to it. Still, we are here to assist you.
Put a spool of thread on the spool pin, and lead the thread end through the front guide of the machine. Then, put the thread end through the bobbin hole.
Now place the bobbin on the winder. In the old sewing machine, you will find the bobbin winder by the side of the handwheel. Push the winder against the handwheel.
Step 12
Next, lead the thread through the soft fork and onto the bottom of the bobbin winder. Now, hold the thread and turn the handwheel for a while to start winding the bobbin. After that, snip off the extra thread you got in your hand. Then, continue winding the bobbin by moving the machine.
Step 13
When the bobbin is fully threaded, cut the thread off. Then, disengage the bobbin from the winding mechanism by pushing the auto shut off arm back and dismounting the bobbin from the spool. And, make sure you set the machine in the stop motion mood.
Step 14
To thread the machine, you need to take the presser foot up. It will release pressure on the tension disc. Move the handwheel and bring the take-up level to the top side of the machine.
Step 15
Next, put a spool of thread on the spool pin. It will be helpful for the stitching process if you put a felt-spool disc to avoid the spool of thread moving too much.
Step 16
Once the spool on the thread is on the pin, tug the thread toward the front thread guide. Then, take it down and wrap it around the tension discs. Make sure the thread is going between the discs and put the thread through the check spring.
Step 17
Next, the thread goes not over the metal arm to the take-up lever. The hole that you have in the take-up lever put it through right to left. There will be another guide by the side of the machine, lead it through that, and finally, put it in the needle stand. From left to right, pass the thread through the eye of the needle. After that, take the thread through the presser foot to the back.
Step 18
Next, put the bobbin inside and set the thread ends out toward the needle bar. The bobbin should move clockwise.
Step 19
Now, to add the upper the lower thread together, pull the needle thread. Then move the handwheel. The needle will go do and take out the bobbin thread with it.
Your old sewing machine is ready to start stitching now!