 Vintage sewing machines are intriguing, and you should be considered if they have one in your collection.
The singer is one of the best reputable sewing machine manufacturers, who doesn’t know that? With the convenience of advanced technology, they have been producing more efficient machines.
Operating an old sewing machine is not the same as the modern one.
Old machines are complex components, which needed to be set from their places.
About that, in modern machines, all components are put together in one place. Hence the operating is essentially different.
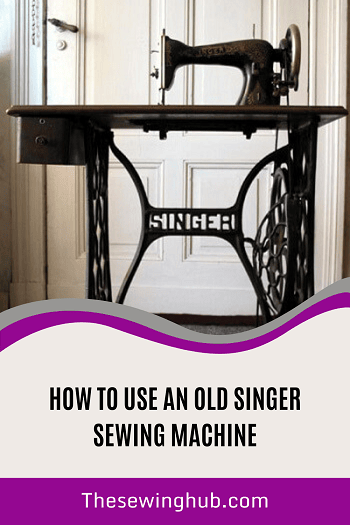
Note that the guide we are giving here is general, which can help handle all the old singer sewing machines. Let’s see how to use an old singer sewing machine step by step.
Threading The Machine
You need to thread all the sewing machines out there to start stitching. The procedures are a little different in old sewing machines. Let’s start with the threading now.
Lower Threading
To perform the lower threading accurately, make sure to use a bobbin that has been made for the machine you have. After you collect the right kind of bobbin, you can start winding it. Follow the steps below to wind a bobbin in an old singer machine.
Step 1
You need to find out where to set to bobbin to thread it. You are most likely to find a bobbin holder in old singer machines either on the right bottom side or on the right top side around the handwheel.
Step 2
Once you find the bobbin winding pin, place it there. The construction might require the bobbin to be set horizontally or vertically. You will see it once when you find out the bobbin winding pin.
Step 3
Now, you need to place a spool on the thread on the machine. You will find the spool found on the machine’s top right side, similar to other sewing machines.
Step 4
When the thread and bobbin spool are in their places, you need to guide the thread through some post near the bobbin and wind the thread on the bobbin for few times. In the old sewing machine, thread guides are on the side where the bobbin is. But in the modern sewing machine, all thread guides are in the opposite direction.
Step 5
Before the pedal, the machine to wind the machine, you need to untighten the knob on the handwheel. This step is absent in modern sewing machines.
Step 6
Now, you need to lock the bobbin in place with the lever. You will find a lever around the bobbin if you look. Old singer sewing machines are needle operated by cranking the handwheel and pressing the pedal with your leg. So, you can start pedaling the machine to start winding the bobbin.
Step 7
Once the bobbin is threaded, you need to install it in the shuttle under the throat plate. The end of the thread always should be on the top. Otherwise, you can’t pull it out from down. Also, the needle won’t be collecting the lower thread.
Step 8
After you set the bobbin inside the bobbin house, you need to lead the thread through some guides on the bobbin shuttle. Finally, you pull the lower the above and close the throat plate.
Upper Threading
Upper threading is somewhat similar to modern sewing machines. Also, upper threading is completely similar in all the old sewing machines. Anyway, you can choose a different spool of thread for the upper threading. Or, you can keep the one you used for winding the bobbin. Let’s see how upper threading is done in old sewing machines.
Step 1
First, place a spool of thread in the pin. Then, take the thread through guides on the opposite side of the spool pin. Also, make sure the backside of the machine places the thread.
Step 2
After taking the thread on the opposite side of the spool pin, you need to tug it down to take it to the thread tension knob.
Step 3
Once the thread reaches the tension wheel/knob, pull the thread by the right side of the knob. Then, put it through the hook by the left side of the knob.
Step 4
Next, you pull the thread up by the right side of the knob and put the thread end through the hook on the top left corner. It’s prominent and looks like a metal post with a hole in it. The hook can pull down and crank the handwheel to set on the machine’s top left side.
Step 5
You need to pull the thread down to the needle area through the hook by the machine’s left side. Also, the thread should make a cross on the top of the tension knob. The thread will meet some guides on the way to the needle. Make sure you pass the thread through the guides.
Step 6
There are a few things you need to be aware of to thread the needle. Most of the machine has a needle place facing the user. If it’s like that, you put the thread into the thread by the front side. Bit, you can find an old singer sewing machine to have a needle placed sidewise! If it’s like that, lead the thread through the needle’s eye from right to left.
Tip: To put the thread end faster through the eye of the needle, cut the edge. As a result, you will get a fresh end. The threaded end will travel through the eye faster as the end is not frayed. And, very normal for the thread end to get frayed after traveling through all the guides on the machine!
Final Step
Once the needle is threaded, you need to tighten the knob on the handwheel. Then, you hold both threads lightly and hand-crank the machine to see if the machine is creating loops with the threads. You can stitch on a scrap of fabric to check the stitch length and speed of the machine.
On A Final Note
As the older singer machines have different construction, the procedure differs from the modern sewing machine. Still, they share some similarities. It’s nice that modern singer sewing machines as re not entirely different from their predecessors. Anyway, we hope you have got a clear understanding of how to operate the machine.
Related Post:
- How to Thread a Singer Sewing Machine for Beginners
- Singer 7258 Stylist Sewing Machine Review
- Singer Sewing Machine 1507 Review
- Singer Sewing Machine 4423 Review