 A lot of sewists utilize regular sewing machines to embroider. You might also want to weave some letters on fabric or on a garment for your loved one.
Now, you can totally make use of your nimble sewing machine to embroider some texts or letters that contain sentiment for you.
Before we dive in, as you’re using a regular sewing machine, you should be extra careful. If it has been a while, you started handling sewing machines, then don’t stress. You should be able to end this project successfully.
Necessaries
The supplies you will need for this project are a free motion foot/ darning foot, tailor’s chalk, a fabric/garment of your choice with fusible interfacing, a glue stick, a 6-inch diameter embroidery hoop, some letter designs of your choice, a pair of scissors, the needle of size 16/100, a needlepoint tracing wheel, a spool of thread with a matching bobbin, a cutting mat, iron machine, and ironing board.
First Stage
The very first thing we will suggest you perform is, if there is an option in your machine, try lowering your feed dogs. Also, you can use some thick rubber pieces to cover the feed dogs.
Where can you find that particular rubber? If you have bought a free motion foot for the sewing, you can sometimes find one with the foot. And, if your free motion foot hasn’t come with a rubber piece, then make sure you buy one that contains rubber pieces.
Now, attach the free motion foot to your machine. A darning foot is an essential item for trying to embroider at home with a sewing machine.
Next, set the stitch functions on your machine. If it has an option for different styles of stitching, then choose the zigzag stitching style. After that, select the length of the stitch.
Usually, a heavy-duty sewing machine has these options. But, your machine doesn’t have the option of selecting a stitching style; you have nothing to worry about. You can make adjustments for the short stitching length in that regard.
Next, select the width between 3 and 2. Be careful in the stage of selecting the width; you can easily break a needle.
Second Stage
To stabilize your design, fix the interface with the fabric/ garment. Let’s walk you through the stabilizing process.
Apply glue on one side of the interface then attach it to the wrong side of the fabric. It’s not done here, though. To attach it properly with the fabric, we suggest ironing it.
So, here you go- once you add the interface with the fabric. Take another piece of cloth and lay it over the selected fabric attached to the interface. Now, sprinkle or spray some water on the cloth targeting the main fabric.
Then, heat up the iron machine, and place it on the cloth. You will hear sizzling noise; that means the water is drying up. Through this, the fabric and interface are getting attached through glue. Press the iron for 10-15 seconds and move on to other sides of the fabric.
By the way, you need to check if they are getting attached. If you find out they are not attaching properly, you should iron it a bit more.
Third Stage
It’s time to transfer the design to the fabric piece. Now, take the letter designs and place them on the cutting mat. With the help of the tracing wheel, make holes around the design. You can also use any sort of pin to pole holes around the designs
You can make some designs by yourself as well. Moreover, if you are aiming for some miniature letter, then you will need a pin to mark the hole around the letter. Tracing wheels are only suitable for big designs.
Now, place the design on the fabric you want it. Take your tailor’s chalk and draw over the design; it will help you to lay the design on the fabric piece.
Next, remove the design paper. Trace the design nicely and clearly on the fabric. This is a step you need to do carefully. If the design is unclear on any side, you will find difficulty embroidering.
Then, attach the hoop to the fabric. Make it fairly snug and, in the end, tighten the screw well of the hoop. It’s going to mess with your design if it stays loose someway. Pull the fabric out of the hoop from all the sides and make it bouncy inside the hoop.
Fourth Stage
Now you are all set to commence stitching. Take the hoop to the sewing machine and lift the presser foot. Lift it as high as it requires avoiding getting hurt by the needle. Once the hoop is under the needle, you can start stitching following the design.
Bring the needle forward for the first couple of stitches to figure out where on the fabric the needle hits. If you do this step, you will be able to adjust the needle according to the design.
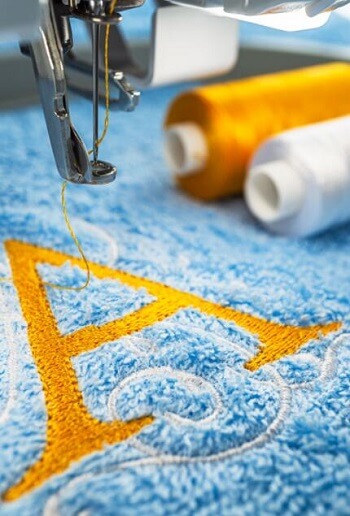
First, trace the needle around the border of the letters; then, fill in the letter by taking the hoop in a back-and-forth motion. You will find this method fun and satisfying!
When you are done with the stitching, you can take off the hoop from the fabric. Next, use the iron machine to fix the indentation of the embroidery hoop on the fabric.
That’s how you embroider letters with your regular sewing machine.
Last words
If you think you did well with this project, then pat yourself on the back. Also, if you are somewhat not satisfied, then you can practice more to make it better. Because sewists embroider with regular sewing machines always, and they do manage to make an excellent result. So, if you think you haven’t done very well, you can always try again.
It is also true that embroidering with a regular sewing machine can be tough. But, if you don’t have an embroidery machine and you love to explore with your sewing machine, then this guide will help you through the embroidering. One last thing, you can also use this guide for any sort of design. Do a little modification with your intuition.