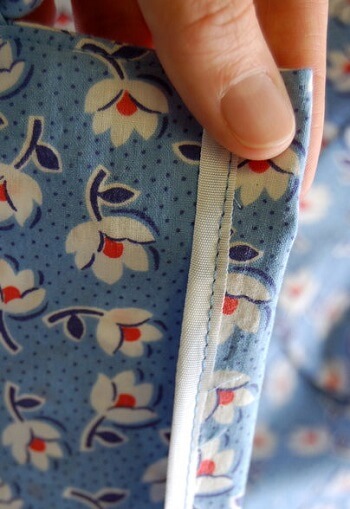
 Bias bound seam is a great way to finish your garment sewing. Bound seams protect the seam’s raw edge and add an extra highlight of color. The bound seam is also known as Hong Kong Finish.
Though they’re a little time-consuming the secret elegance is worth it! There are a few ways for sewing bound seams.
Double-folded bias tape is used in bias-bound seam to finish off a seam edge.
You can apply the bias tape separately (a pressed open seam) to both of the seam allowances or at once (a seam pressed to one side) to both seam allowances.
When doing this, be careful about the weight of the fabric as the seam can end up too thick.
Today, I will show you one method that I like most. Let’s do it.
Tools You are Going to Need
- The fabric you want to use.
- Appropriate Needle and thread for your selected type of fabric
- Standard foot
- Binder’s foot
- Appliqué scissor or any sharp scissor
- Pins
- bias binding or bias strips
- Iron and ironing board (As Pressing is an important part of the finishing techniques)
How to Sew a Bound Seam with a Sewing Machine
Step1:-
Prepare your seam with your seam allowance by finger pressing the seam allowance to open a little. These seam allowances should lay a little flatter. By doing this, you will make it a little easier for further process.
Step2:-
Take some bias binding or bias strips. You can make them at home or get premade from stores.
Step3:-
Take your prepared seam allowance and lay the bias strip on the top right of one side by matching the raw edges. Now pin your binding inside of the seam allowance for sewing a narrow seam allowance to attach the binding.
Now you need to push all of your fabric to the left before starting sewing. So that accidentally you won’t sew through the right part of your garment.
Step4:-
Now get yourself ready to make a narrow seam allowance. You can use the edge of your presser foot as your guide. Sew a straight stitch to attach the binding with seam allowance.
When you reached the bottom, you need to cut off the excess part of the bias strips.
Step5:-
Now your task is to use an iron for pressing the seam down. Finger press will not be effective because it becomes stretchy and bouncy.
Step6:-
The next step is to trim the seam allowance down. You have to leave about 1/8″ on this seam allowance, cutting the narrow seam in half.
Step7:-
It’s time to fold the binding under and stitch it again. Use some pins to pin the binding under. It’s nice to pin right close to the seam and flip it to make sure that you are getting that binding on the other side.
Step8:-
Now you are ready to take it back to your sewing machine. Put the seam allowance under the presser foot. Before starting, you can use a hand wheel for lowering the needle a little so that you can see where the needle is going to land.
It should fall right in the seam or a little to the left of the seam. As now you know where it’s going to fall, you are ready for stitching.
Step9:-
When you get near to the end, make sure that the binding is not coming out and staying tucked under because it should have a tendency to move around as it is stretchy. Now pull this out, and you have your bound seam ready.
As you are finished now, you can take the garment to the iron and press it so it will look excellent and flat.
More Helpful Tips For Sewing a Bound Seam
- If you find it difficult to stitch in the “ditch,” or there is no specialty foot with you, you can try stitching to the right along the edge of the seam. Or, you can try a zig-zag stitch for a nice finish.
- Store-bought premade double-sided bias tape is better to sew because it is made more precisely.
- If you want to make the double-fold bias tape at home, use a longer piece of fabric to minimize your seams.
- If you are using available store-bought tape, make sure the narrow side of that is going on the right side of the seam.
- It is wise to use lightweight fabrics for the bias tape so that you can reduce seam bulk.
- This method is standard in a garment factory, but it can be used on accessory items and home décor. If you want to turn a corner, you will get some online tutorials about mitering a corner using the bound seam.
- Bound seam technique is also utilized on an outside edge of the garment, such as around the neckline or top of an unlined bag or sleeve edges on a garment.
- If you want to create something reversible, you need to use a bound seam. Because in this case, the French seam will not work.
- You can avoid an indention on the right side of your garment at the time of pressing the final seam by placing a portion of a brown paper bag between the layers of the fabric.
- If you want to use a print or bold color fabric for binding, you need to make sure that it isn’t too. Otherwise, the color of the binding can be visible on the right side of the garment.
- If you want your stitch line possibly more even, you can try using an edge stitch foot.
- Think about the order of the pieces to construct your sewing project.
- You should try a binding strip of various widths on scraps sewn, having an exact seam allowance before starting the bound seam technique. [/su_box]