 Tame thread problems, learn how to prepare your machine with this shown tutorial guide.
I am going to display you how to thread your sewing machine while preventing some common problems contributing to significant disappointment.
The thing about threading your sewing machines is that each model has a little different style of threading.
The models of Brother sewing machines are a smaller bit different from Kenmore, which is a lower bit different from classic sewing machines.
That is why it is a clever concept to look at the manual even if you are real sewage.
If you do not have a manual for your machine, this tutorial guide should give you a wise concept of the steps. Something as simple as having the reel of thread unwinding in the incorrect direction can do damage to your stitching. So, let us begin with the reel.
Sewing Supplies
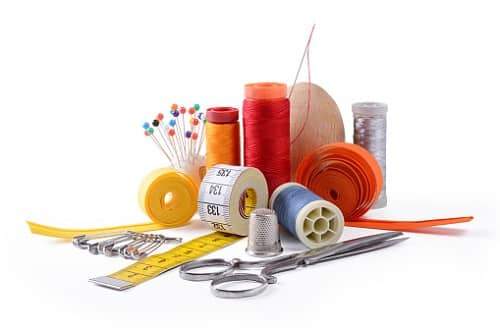
For this method, you will need a high-quality pure polyester or pure cotton thread. Here are two of my favorite.
Keep in mind that a thread guide with a small round mushroom cap is the essential part of the bobbin threading system, so you should bother with that. The only help you need to understand is the small metal loop situated before the tension plates and channels.
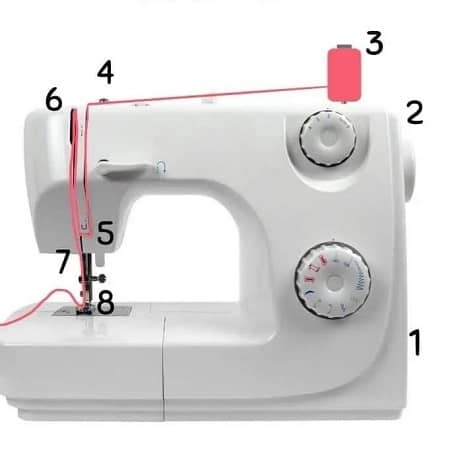
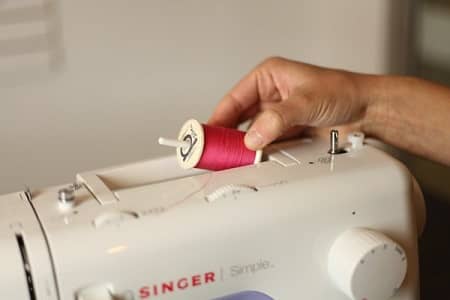
- Place your reel of thread on the spool holder. If you feed necessary, cover with a spool cap.
- Bring the thread link on the top of the machine.
- Carry the thread through the first row of channels, ensuring that the thread goes through the tension disks or tension disks.
- Follow the threading direction downwards; carry the end around the area in between the two channels.
- Bring the thread up, following the second or left-most direction.
- Now for the challenging part, ensure that the thread hooks around the thread usage liver. If necessary, turn the hand wheel to raise to the top place.
- Carry the thread all the way down to the needle area. Be sure to capture the needle thread guide, a little eyelet situated on the top side or side of the needle.
- Lastly, thread the needle. For most home sewing machines, the end goes through the needle from the front side to the backside. Now you are done with preparing the thread!
Step No 1: The Thread Guide
After your thread is on the reel holder, take it through the first guide.
Step No 2: The Tension Plates
Guide your thread through the straight channels. This is where your tension disks are. To ensure that the thread goes through the plates, jerk on both sides to keep the thread trained while directing it through. If you are not sure whether it worked well, shift your tension button to zero, try it again, and then re-tighten the tension.
Step No 3: ‘Round the Horn
Continue directing your thread through the channels that run from the top through the head of the machine. Once you turn the bottom side, wrap the thread around a horn and take it up the second row of the channels. You are making a sharp U-turn.
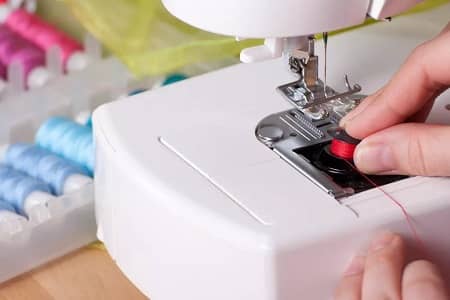
Step no 4: Capturing the Thread Uptake Lever
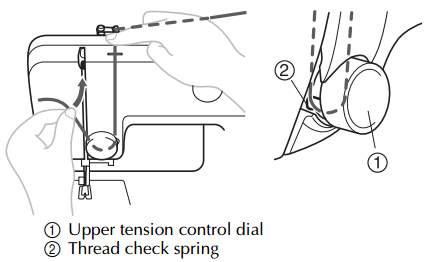
Catching the thread usage handle is one of the most important steps. Having carried the thread down and hooked it around the middle medium, take it up to the thread usage liver, ensuring that the thread is captured in the level.
If necessary, change your hand rim to increase within the threaded needle, which will help you to finish the process. This close-up picture reveals the thread uptake handle on my Kenmore Small Super sewing machine.
Preparing Your Cloth for Cross Stitching
When you are starting a sewing project, it is necessary to make your cloth in particular methods. Wait around, let me rephrase that is not necessary but optionally available and very helpful later. There is just a pair of products that you may choose to do to prevent frustration later on in assembling your project.
First, there is the problem of pre-washing your cloth. If you have ever stitched anything, you will know that medication is a sewing project; the first factor you do is clean your fabric.
This is sometimes suggested for your cross sews cloth also. I think most stitches would believe the fact that this is not necessary. When a person finishes the work and cleans it, it will not shrink enough to cause a problem.
On the other side, if you are using a deeper shade cloth, you may want to pre-wash the information to prevent the dye from going after it is padded.
I have never individually run into a problem, but I have often observed experiences of others that have, and I would rather be secure than sorry. It is quite easy to set the shade in your cloth.
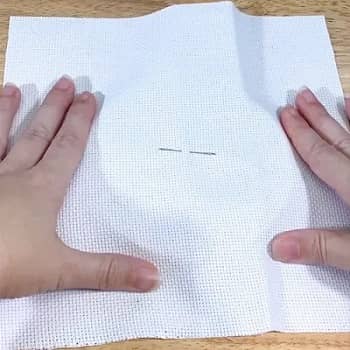
Second, there is the problem of your fabric unraveling while you are sewing. I know many stitches that do not worry themselves with this problem.
I indicate if you are not going to bother with the information unraveling, then you need to be very certain to cut your cloth sufficiently to allow for this because it will occur.
- Masking Tape – You should cut your cloth massive enough that was covered with the tape when you have completed it. The sticky on the tape will exchange to the cloth and eventually can cause the fabric to start rotting. The advantage to this is more control over how much material you will forfeit to unraveling or tape damage.
- Fray-check – You may use this cloth stiffener to the sides of your fabric. I fear that this will have the same effect as the adhesive in the masking tape. I am involved that the harmful substances in these kinds of items will cause rotting and stain in the cloth gradually.
- Stitching – There is the best service to be operating zigzag sewing along the sides of the fabric.
After getting these two problems out of the way, you are ready to sew. I hope that this will help save you some of the aggravations of studying Cross sewing.