 If you are in the mood of doing a beautiful project without your sewing machine, we have an amazing quilting DIY guide for you.
The process will take a long time, as you will be sewing by hand. But, we can assure you, you will be happy with the result.
Let’s make a quilt!
Supplies
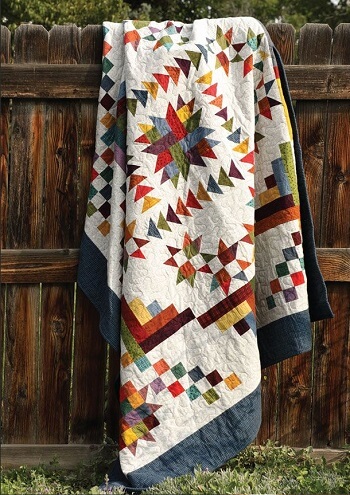
This guide is to make a quilt from various stripes of fabrics. The best part of this idea of the quilt is, it has no binding on the sides.
You will need strips of fabrics, some batting, and some backing. We are leaving the size up to you. Still, as you will be doing it by hand, you better choose a small length for the quilt.
Also, clearly, you need thread, a long needle, a long and wide ruler, and fabric scissors. Then, you will need an adhesive spray, or you can use pins and, finally, an iron machine.
About The Stripes Of Fabrics
Before we take you to the actual steps of quilting, we won’t make things clear with the fabric stripes. You can make the strips in different widths. Although the quilt we are aiming for, we want you to choose from 1/2 to 4 inches of fabric stripes for that. We will start the process now-
Step 1
First, you need to sew all the strips together. To do that, take one strip and place it with another stripe. Then sew them together with a quarter-inch seam.
Once you are done with the first two stripes, keep on adding all the stripes one by one with a quarter-inch seam.
Step 2
Now, if some of the fabric pieces or stripes have selvages, you need the cut all the selvages off. When you are cutting them off, make sure you’re using a long wide ruler. This way, you get the right proportions from all sides.
Place the ruler on the fabric piece that you have made from stripes, carefully cut the sides off.
Step 3
Take the batting, and lay that on the floor. If you have got a large table, you can surely lay on that as well. But, don’t try to do this step on a smaller table. Otherwise, you will end up with uneven sides.
Step 4
Next, place the quilt top you made out of stripes over the batting evenly.
Step 5
You need to attach the quilt top and batting together. If you have adhesive spray, then apply that on the wrong side of the quilt top by flipping it gently. Then, put it back on the top of the batting, and make sure it is aligning correctly.
And, you don’t have the spray. You can simply use pins. Add the quilt top and batting with each other with pins. Make use of as much as pins needs, so they are rightly attached. When you pin them, check if the pins are properly passing through the quilt top and the batting.
Step 6
After adding them together, straighten them by using the palm of your hand. You don’t want wrinkles on the beautiful quilt, do you?
Step 7
It’s time to cut the batting. It is taking the quilt top as a template cut the batting around. Do it slowly, and don’t cut the quilt top.
Step 8
Now, lay the backing material on the floor on a large table. After that, lay the quilt top and batting on the backing piece. Next, cut down the backing piece by using the template of the quilt top and batting.
All three layers should be roughly the same size. If you see any of it isn’t aligning right, please do some readjustment. This is why it is really important to cut the fabric carefully. Or, you have to do it all over again. People make mistakes in the readjustments too. So, it’s better to be careful and slowly for the first time.
Step 9
By keeping the front piece in the middle, once again, pin all three layers together. And, straighten them with your hand before start sewing.
Step 10
As it’s a quilt, you need to keep a little opening. Still, wondering why? You need to sew the layer by the wrong side. When you are done with the sewing, you will have to take out the right side of the quilt. We suggest you keep 12 inch opening on any of the sides.
Step 11
You need to sew the layers with a half-inch seam. Don’t try sewing with a seam lower than that because all the layers should be sewn together to make it look perfect. Also, in quilting, it’s very normal for the layers to move around a little bit. Sew them, leaving the 12-inch opening. While sewing them, make sure you aren’t leaving any of the sides of the layers.
Step 12
Corners will get bulky. To fix that, you need to trim off the corner a little bit. Again, don’t cut in the stitches.
Step 13
Now, bring the right side out by putting your hand inside the quilt. Tip: pull from any of the corners. Next, tidy up the quilt by pushing from inside, also pull from the outside is required. Focus on the corners; they usually don’t get tidied easily.
Step 14
You have an opening in your quilt. Before you topstitch the quilt, you need to close the opening by catching all the layers together. To do that, iron the opening to make it easier for you to sew the layers together. Now, stitch nicely, matching it with the already stitched sides.
Step 15
Next, start the topstitching. Go for the sides first by quarter inch seam. And, for this particular quilt, you need to do the stop stitching by following the ditches. That means you need to follow the seams of the fabric stripes.
If you sew it in a crisscross manner, the quilt won’t look that good. So, you should do the topstitching by following the lines between the fabric stripes. Once you are done with the topstitching, your quilt will be ready.
To Conclude
We hope it came together beautifully. As are hand stitching, you can choose one whole fabric if you think the stripes will be too much work. Maybe it could be your next quick project without a sewing machine.